desk lamp
I wanted a very durable and stable LED lamp, for my garage for doing late night woodworking for my young enterprise business, Palatable Products, and for my desk for soldering. I was competent with Fusion 360 so I thought I would build one. I wanted it to be powered with a USB C cable, have a simple switch, and have a long and articulated arm.
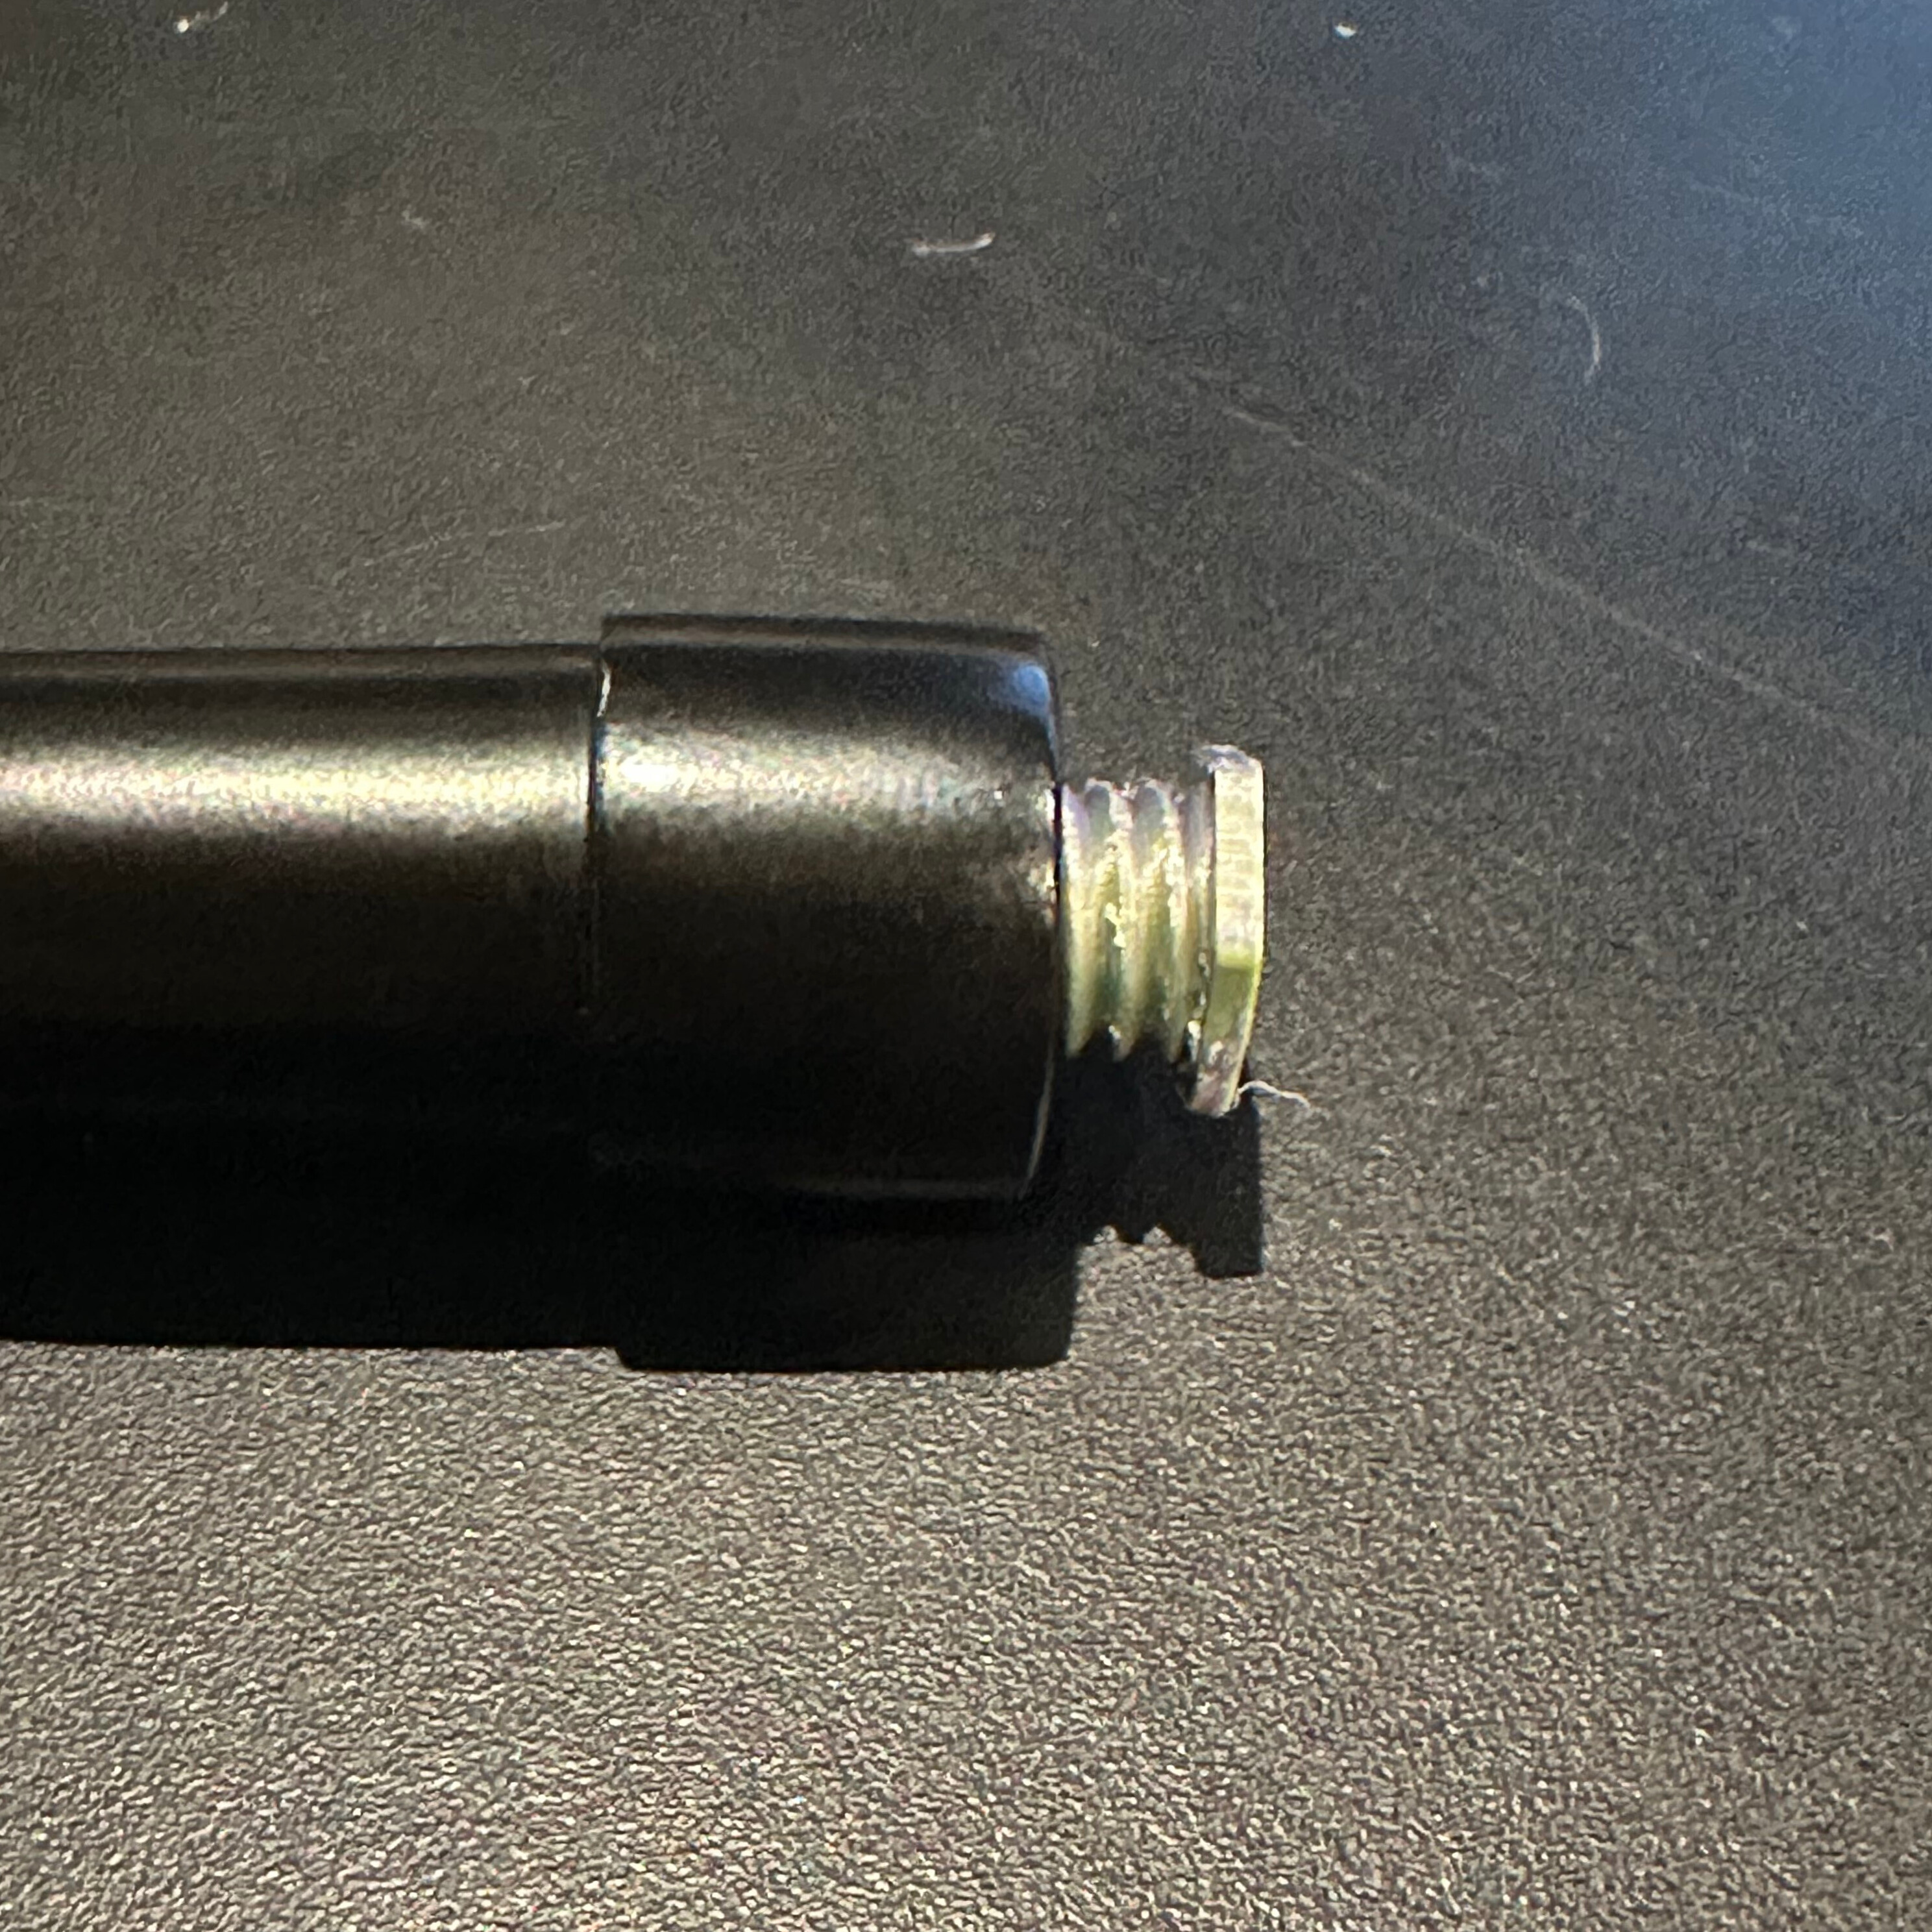
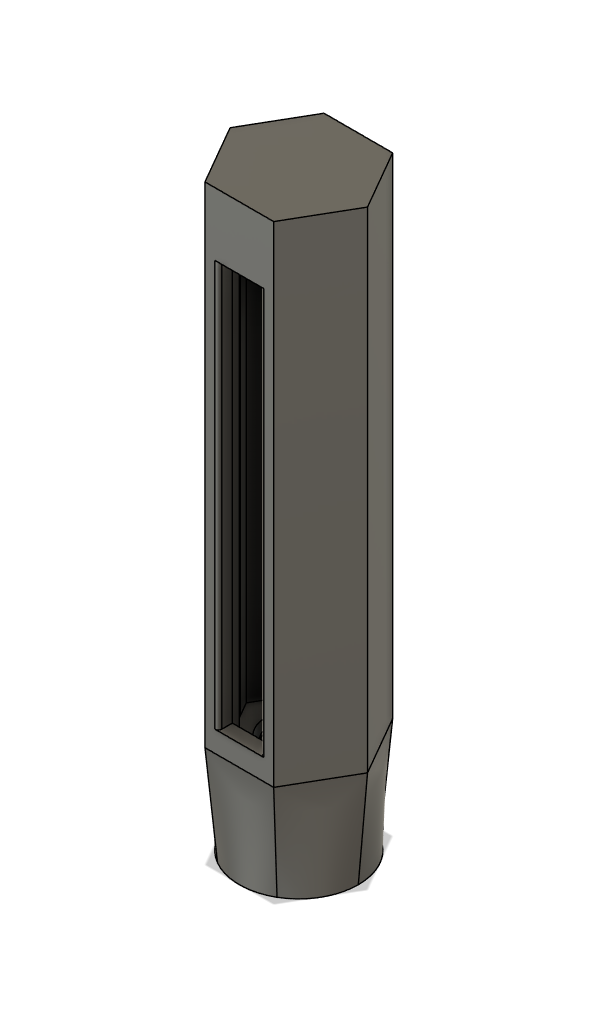
I came up with a design that would involve a metal gooseneck so that it would be fully adjustable to any orientation. Though the problem with a gooseneck is that it can flex and slowly droop downwards, so I needed a high-quality arm that wouldn’t. I settled on a gooseneck made for a microphone, which was a much heavier weight than an LED with a small aluminium heatsink.
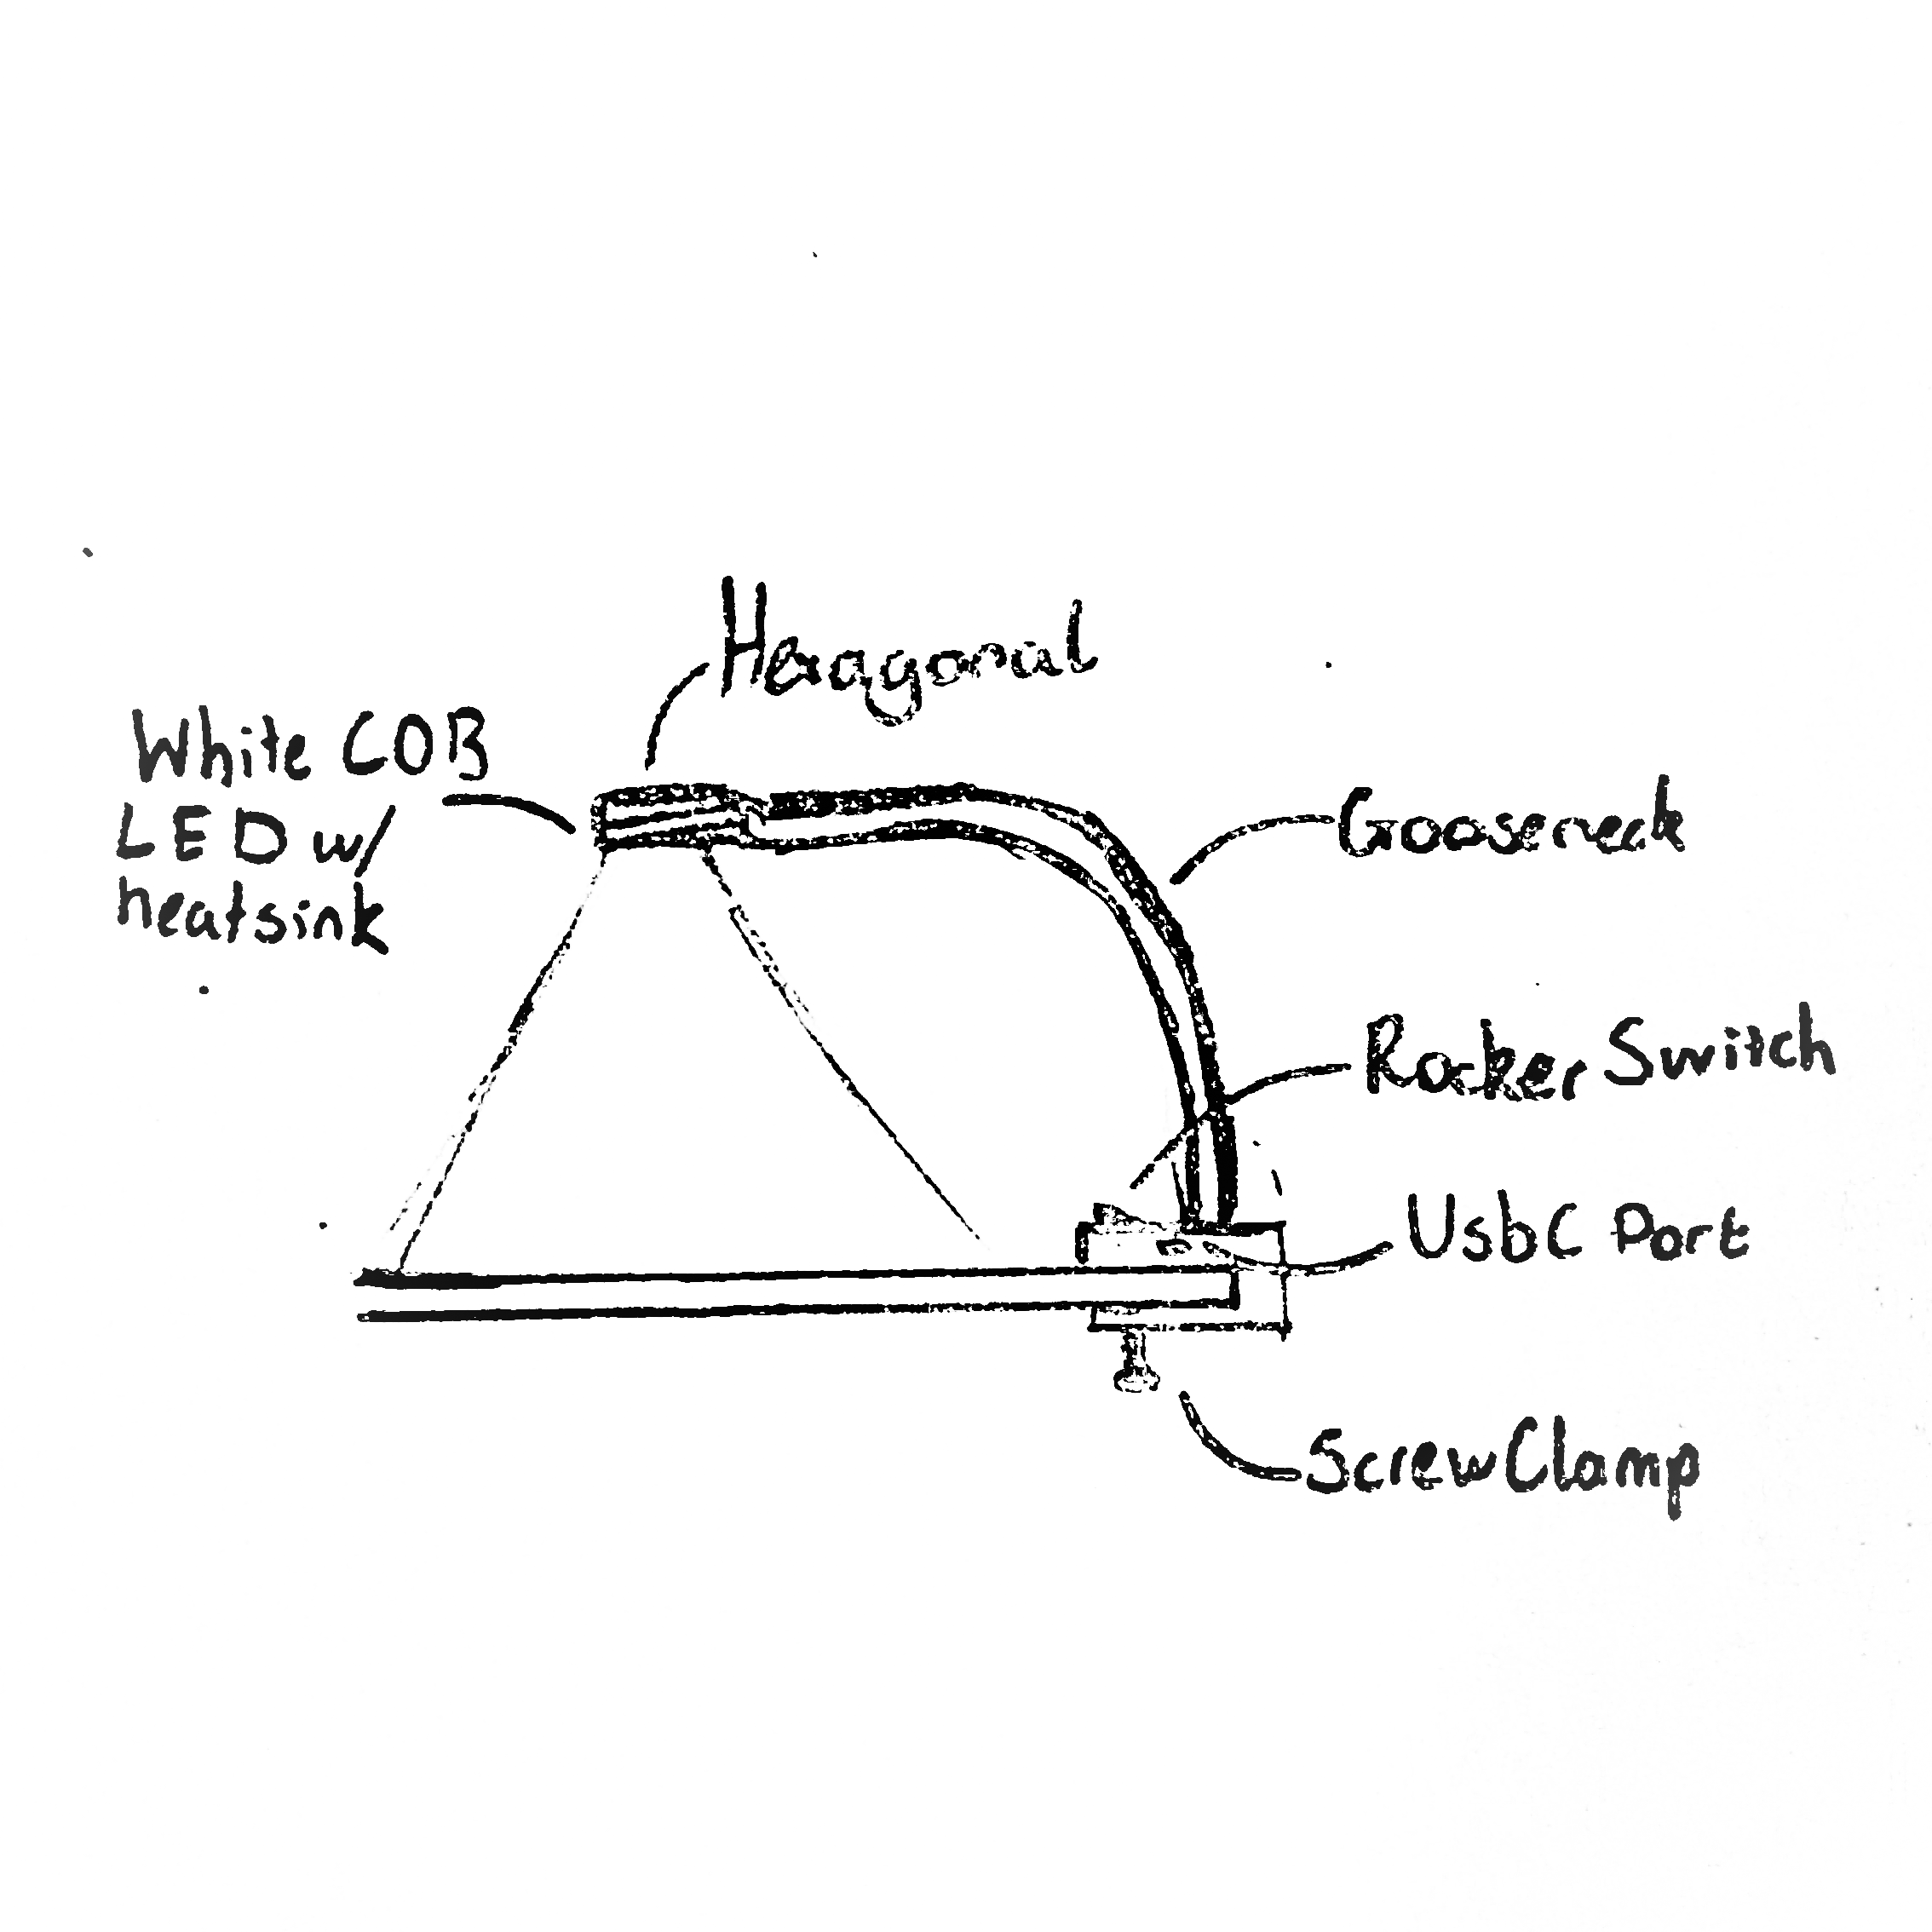
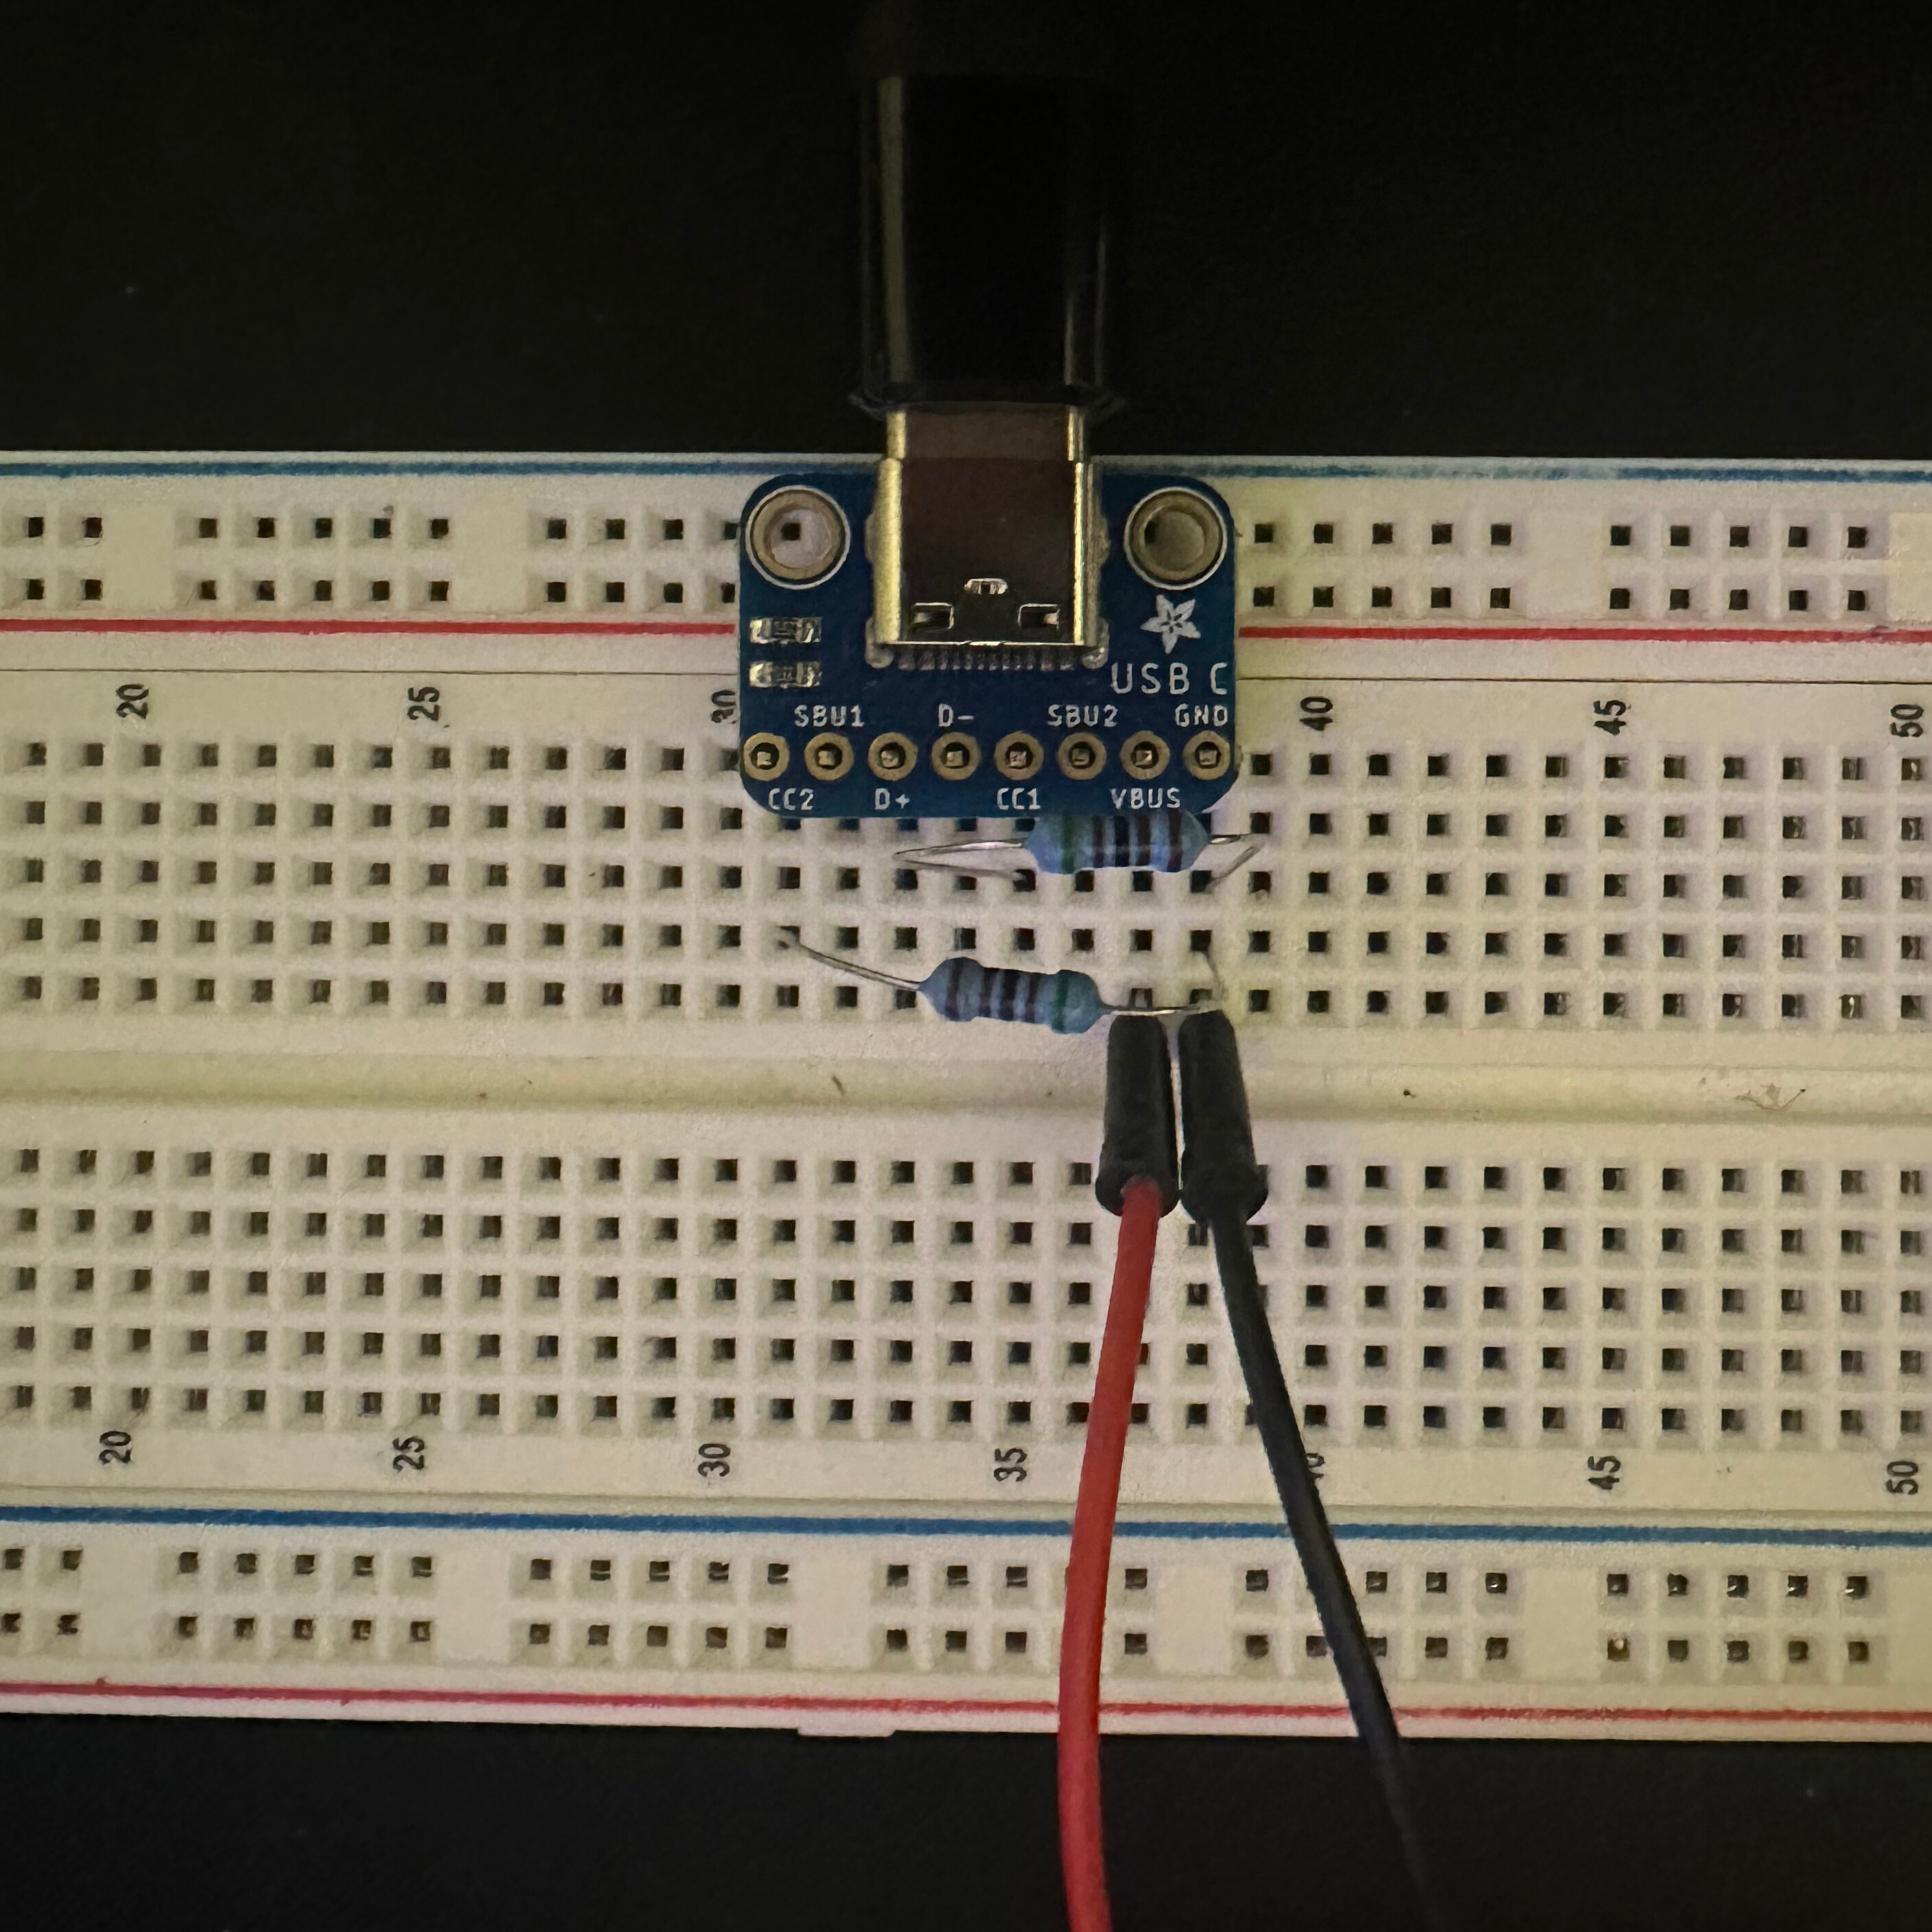
I would also need a method to get power from a USB C cable. I got a USB C breakout board and after a lot of time-consuming research figured out to get power from it you need to connect two 5.1k resistors from CC1 & CC2 to Ground and then the Ground is the negative terminal and the VBUS is the positive. This gives around 5V.
Connecting that to a rocker switch will then turn on the LED. I volunteer at Recyke-A-Bike, a local bike recycling shop, and I was allowed to take one of the bike headlights, which are extremely bright. It is a thin white COB LED.
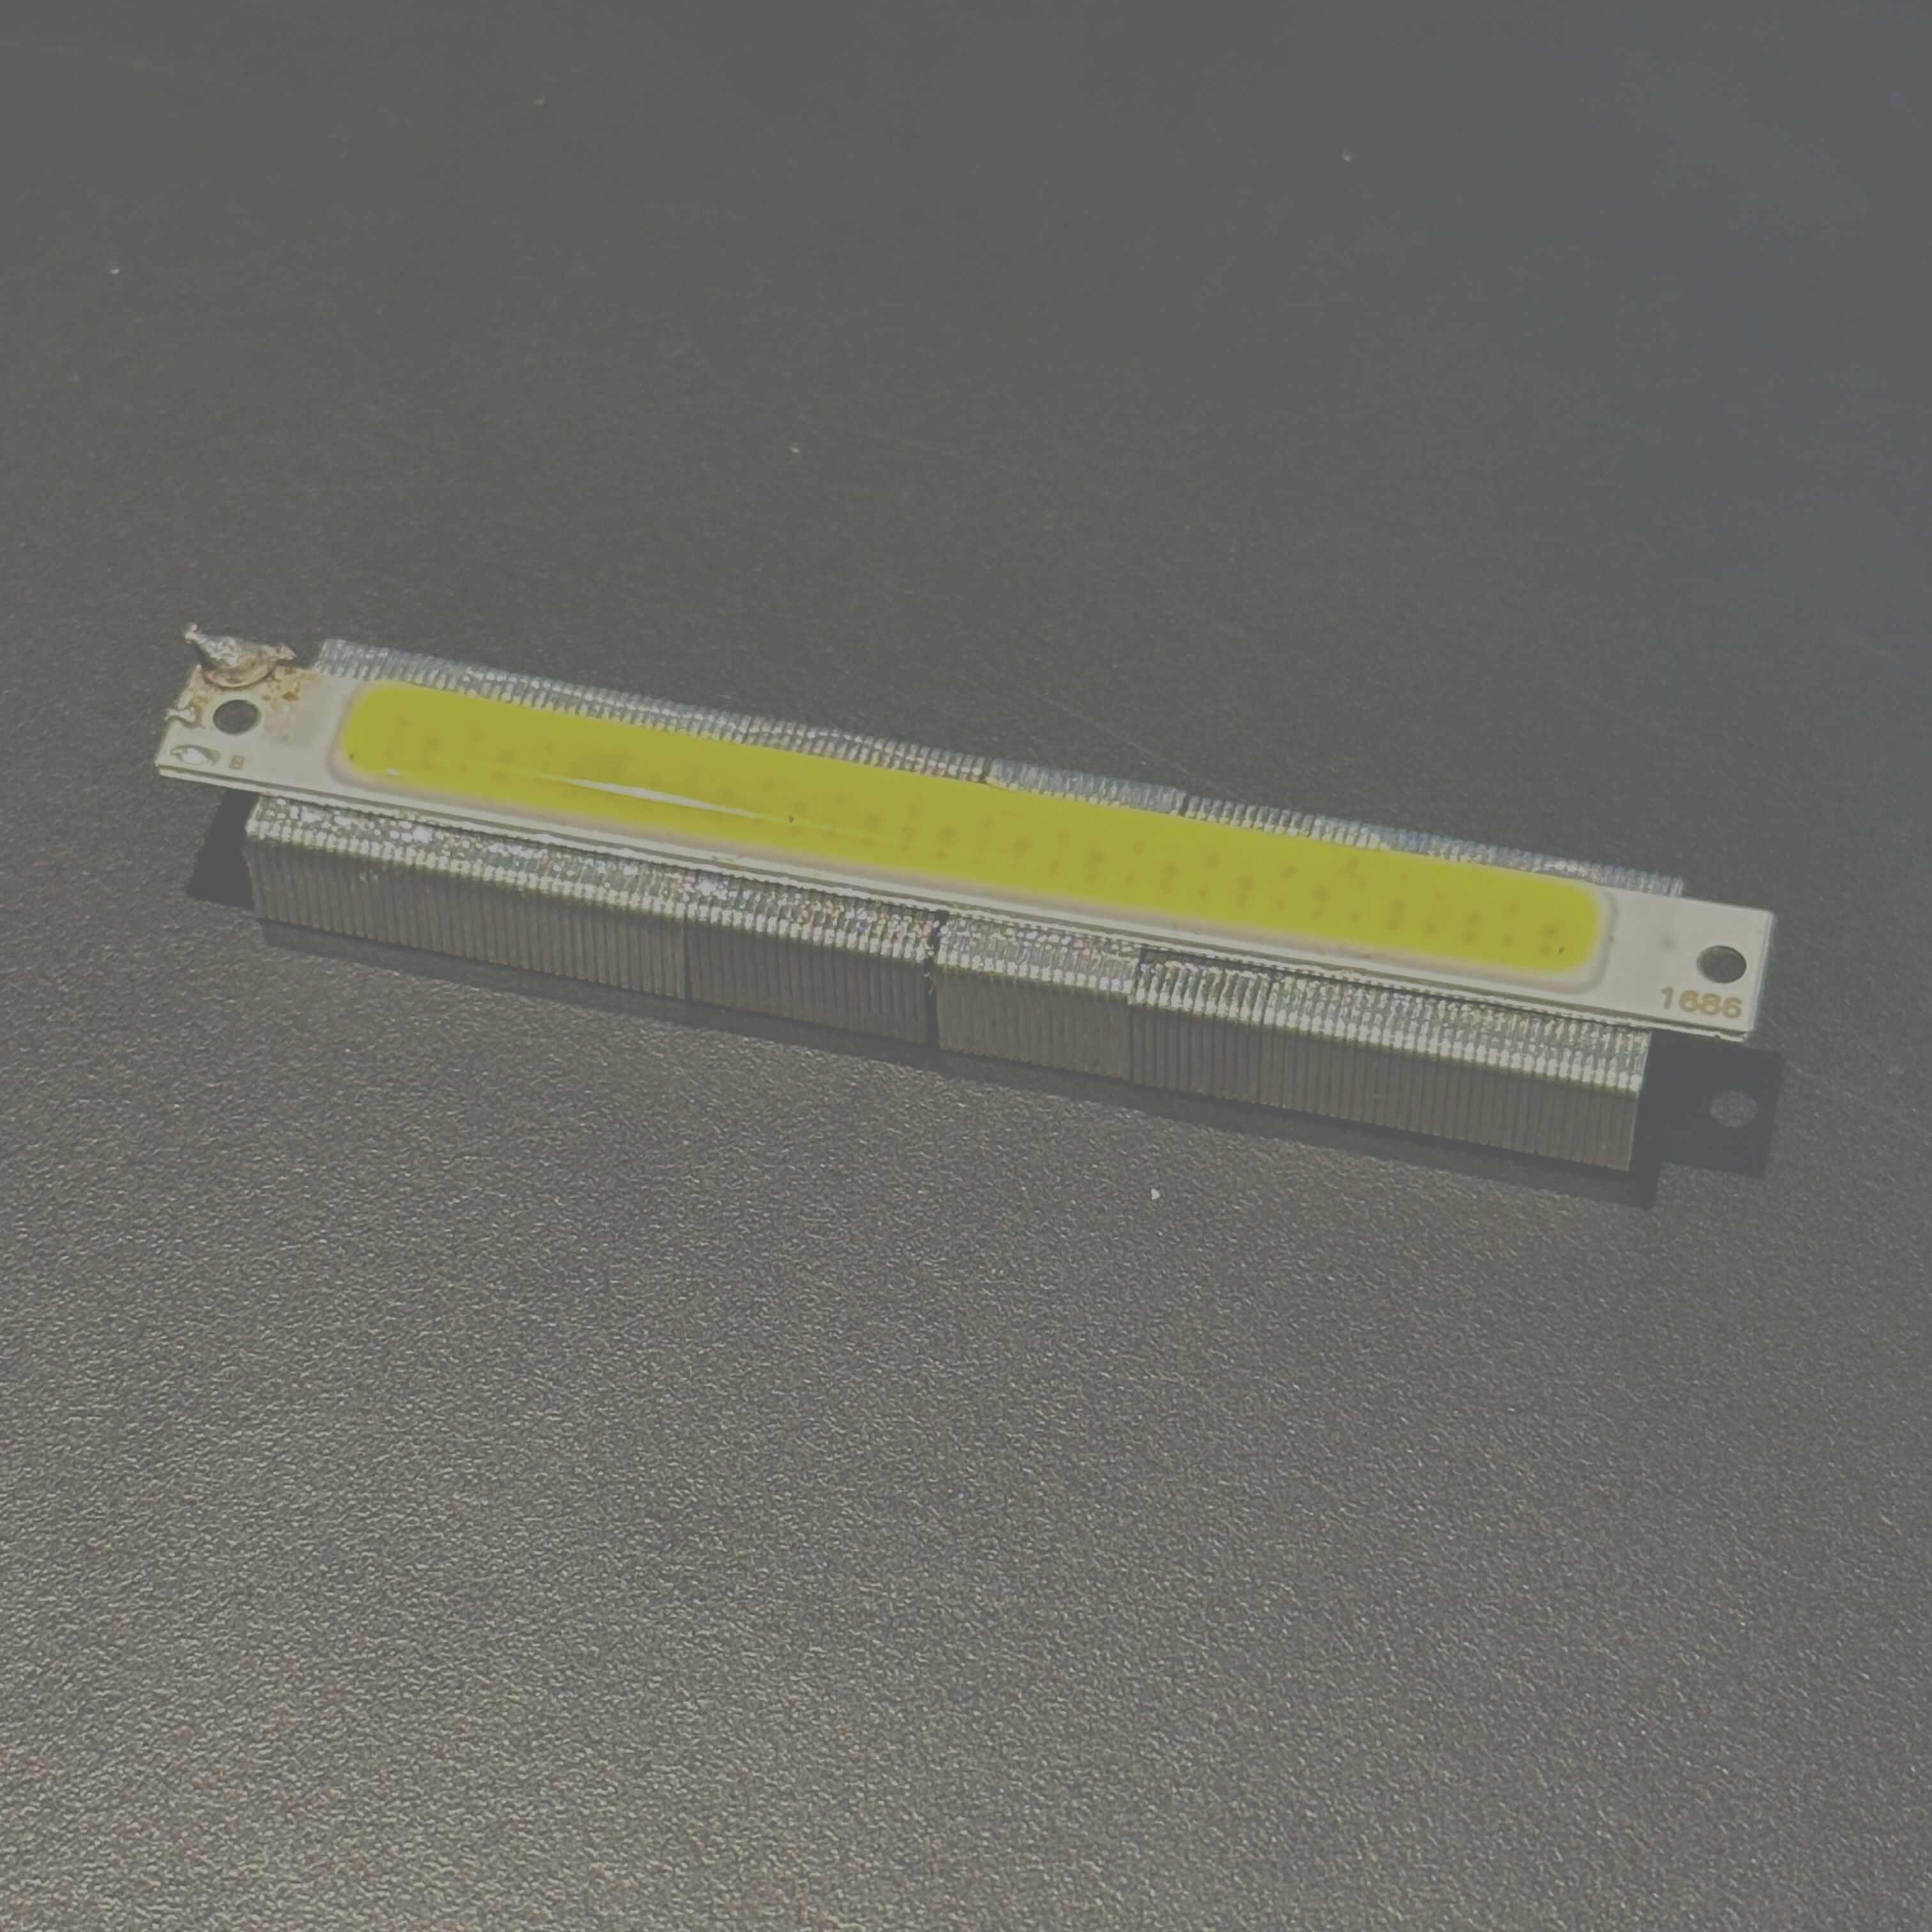
I then got a small aluminium heatsink that I still need to cut down to size.
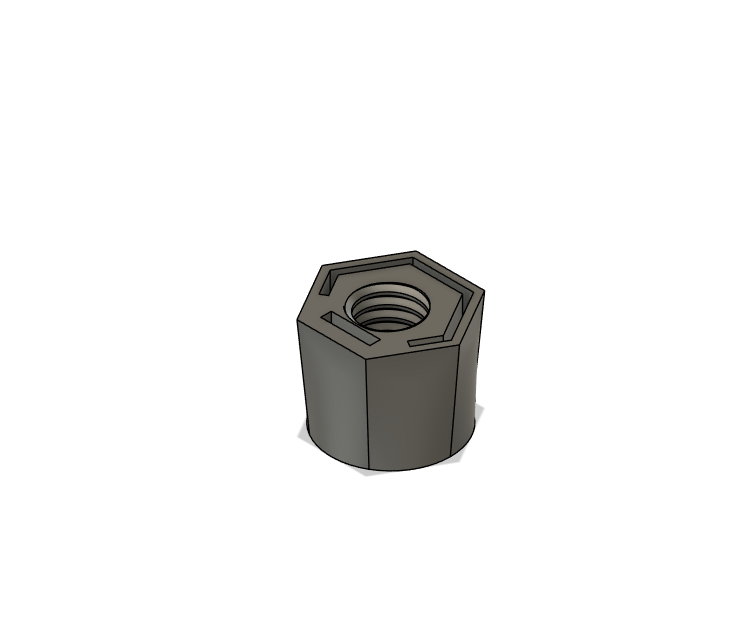
Next was the issue of how I will attach either end of the gooseneck to components. I found I could 3D print pretty durable screw threading and after a lot of trial and error found one that fits the gooseneck.
I then designed an LED holder that would connect onto a thread joint so I can put the LED into the holder then melt the plastic together to shut it together and then screw the head onto the gooseneck. This was a fairly complex part to design it had to fit very tightly around the LED and it was all in a very small space so there were lots of things to consider.
Then I researched into PLA smoothing to avoid the layer lines that naturally come with filament 3D printing. Using all-purpose wood filler mixed with acetone, sanding, and then using auto-primer should make the prints look a lot more finished and professional. This is as far as I have got to so far.